How can you publish the output of a completed gradle project to the Maven Central Repository, so that everyone can benefit from your work? Last week, I went through the process and published a simple clipboard operation project I wrote. I found it a bit complicated, the process was long, and with gradle, the updates are too fast and compatibility is poor. This makes the documents found online somewhat inconsistent. What's worse, even the official gradle publishing tutorial from Sonatype is inconsistent with the latest gradle8 version. Therefore, I could only refer to the process inside, and the details had to be figured out by myself.
The Essence of Publishing
The essence of project publishing is to package the project into a usable artifact, which includes compiled bytecode and a configuration pom file containing project-related information. These outputs can be uploaded to a hosting platform available for public use, such as Sonatype Nexus Repository, and eventually synchronized to the Central Repository. When a dependency is needed, the dependency identifier groupId:artifactId:version is declared, and the build tools Maven/gradle will automatically fetch and use the dependency from these repositories. Therefore, the core operations of publishing are actually two:
- Package the project into output
- Upload the output to the hosting platform
Publishing Process
Here, I will take publishing to the Sonatype repository as an example. This is an open-source artifact hosting platform that everyone can use, and the outputs are all public.
The version of gradle used here is the latest 8.2
Create a Ticket
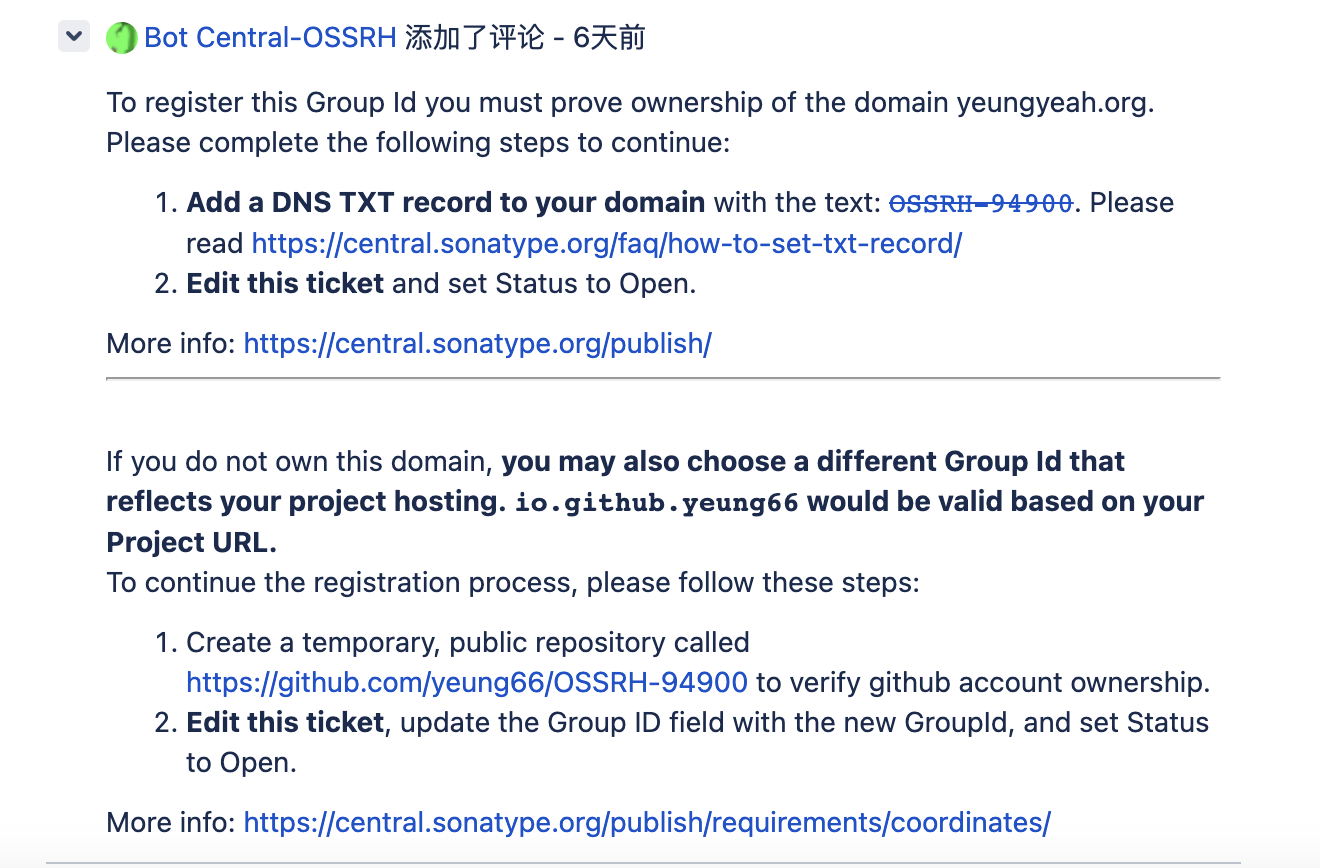
If you want to publish output to a public repository, you first need to register a JIRA account with Sonatype, and then submit an issue to create a ticket for the output to be published. In this ticket, you need to fill in the basic information of the output to be published, including groupId, project address, and project code management address (SCM).
After the ticket is filled out, Sonatype will review the relevant information and confirm whether the user has ownership of the groupId used (that is, whether they have control over the domain name reversed from the groupId). For example, if I want to use my own domain name top.yeungyeah as the groupId, I will be asked to add a resolution to the domain name's DNS. In addition to these common domain names, you can also use the GitHub Page provided by GitHub as a domain name, such as io.github.username. The verification method for this is quite simple, just create a GitHub repo. Therefore, you need to consider the groupId when publishing, and you can't just fill it in randomly.
Improve the Project
Sonatype has certain quality requirements for the projects to be published. In addition to the jar package compiled from the project, it also requires the project's source code and javadoc to be uploaded and published to the hosting platform. This requires additional configuration in the gradle build configuration file build.gradle.kts.
| |
In addition, the information contained in the pom configuration file generated by the published project is required to be complete, such as the developer information of the project, the open-source license, all need to be configured.
maven-publish
Some people may find it strange why we use gradle, but we keep talking about Maven's publishing, and the publishing is also to the Maven Central Repository. In fact, gradle can support many types of dependencies, in addition to maven, it can also support ivy. However, Maven is now more widely used, so basically, we are using dependencies in the maven repository (and it seems that gradle has not established its own dependency format standard).
The latest gradle can use its maven-publish plugin to complete the publishing-related functions, rather than the previous maven plugin. Many of the configurations mentioned in the above documents are not available in this new maven-publish plugin😂
| |
The account and password can be placed in the gradle.properties under the user directory to prevent leakage.
signing
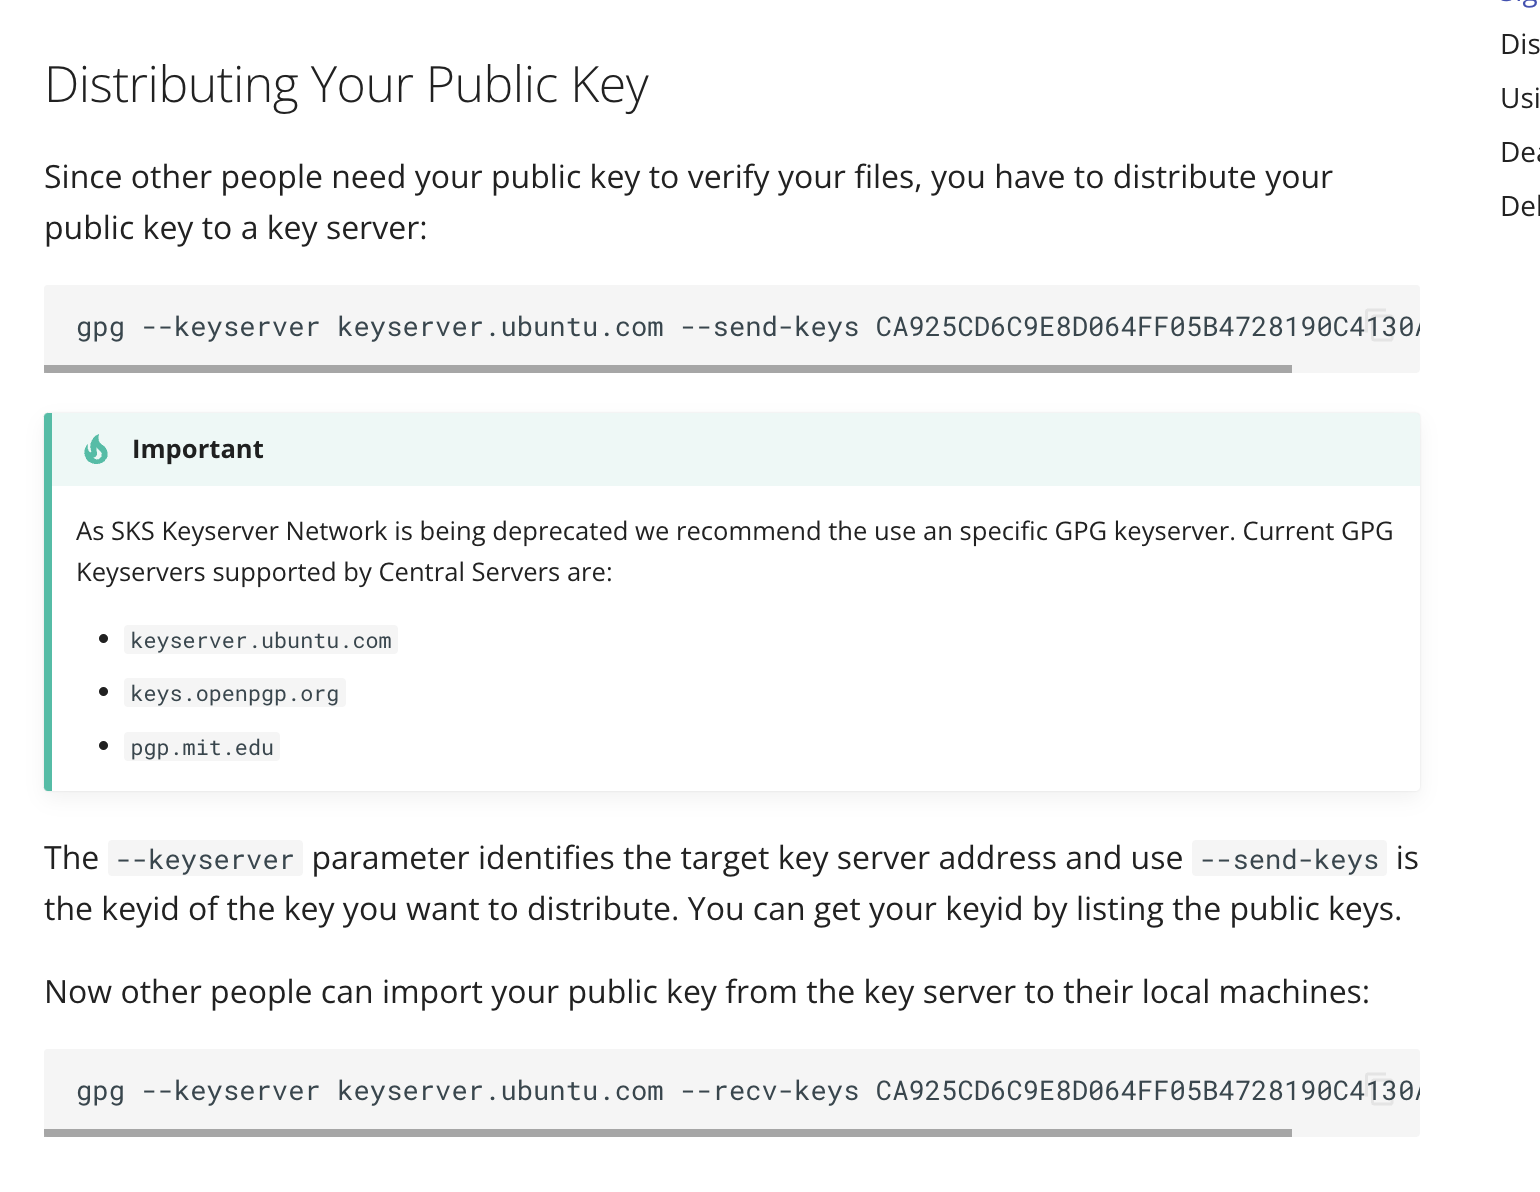
After generating the output, you also need to sign the generated output. This allows the hosting platform to ensure that the upload is completed by the user and guarantees the reliability of the output. To sign the published output, you need to first generate your own key and use the corresponding private key file for signing. Then upload the public key to the public key server for the hosting platform to obtain the public key for signature verification.
The specific steps are as follows:
- First, use gpg to generate your own key, you can refer to Ruan Yifeng's this document
- Based on the key generated above, get the path of the private key, use the password of the private key, the keyId of the public key, and fill it in the gradle.properties file. For security and not to leak personal information, this kind of sensitive information can be placed in the configuration file under the user directory instead of the project, so that it can be well avoided from being leaked with the code repository uploaded to GitHub.
signing.keyId= #The last 8 symbols of the keyId signing.password= #passphrase used to protect your private key signing.secretKeyRingFile= #absolute path to the secret key ring file containing your private key- (Since gpg 2.1, you need to export the keys with command gpg --keyring secring.gpg --export-secret-keys > ~/.gnupg/secring.gpg).
- Upload the public key to the public key server
- Add the signing plugin in the build issue and configure it
plugins {
    ...
    signing
}

signing {
    sign(publishing.publications["maven"])
}
After the above configuration, when executing the build publishing task, it will automatically sign the build output.
Execute Publishing
Just execute the gradle publishing task
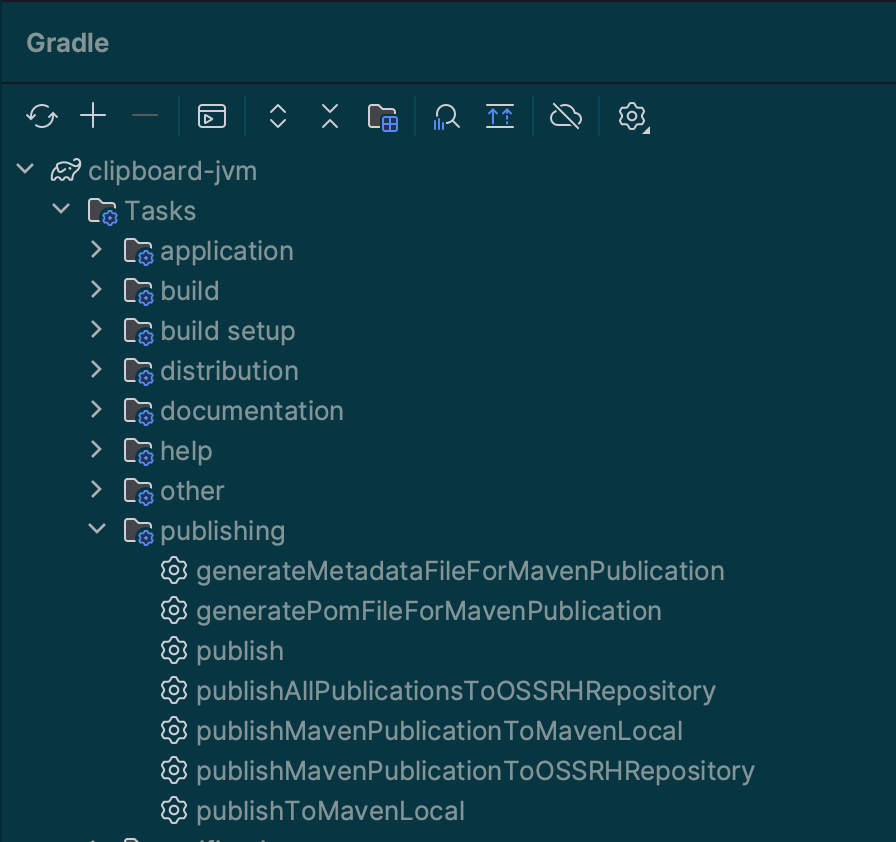
If executed smoothly, the project will package the compiled output, sign it, and then upload it to the hosting platform. At this time, you can release a release in the hosting platform.
Find the output just published in the staging repositories, check the uploaded files for errors, and click the close button, it will automatically advance to the inspection stage, checking whether the published output meets the standard. This check includes the quality check and information check mentioned above. After the check is passed, an email reminder will be sent, and then you can click the release button to officially publish the output. After publishing, the output will be synchronized to the Maven Central repository, and you can query it on mvnrepository or sonatype central. However, this staging step seems to be automated through a plugin. If it can be automated, it might be simpler.
At this point, the gradle project can be successfully published to the Maven Central Repository for everyone to use.